Battery Connected Tracker
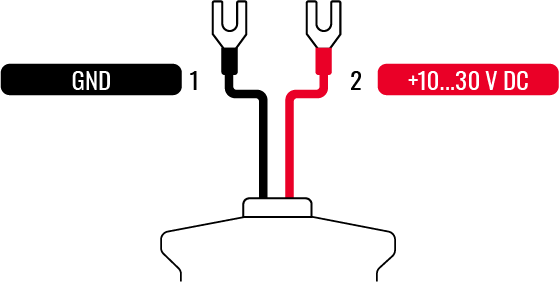
Easy install Just connect red wire to +Positive terminal on battery and – black wire to neagtive terminal on battery.
Mounting recommendations
Device fastening
- Locate the battery in your vehicle. If present remove the battery cover to access the battery.
- Wipe clean the installation surface of the battery if any dust or dirt is visable.
- There is a double sided tape on the back of the device, use it to attach the device on the battery, so that the GNSS antenna and LEDs indicators are facing up.
Connecting power wire
- Device power wire Red+is designed to be directly connected to the positive terminal fastener of the vehicle battery.
Connecting ground wire
- Device ground wire Black- is designed to be directly connected to the negative terminal fastener of the vehicle battery.
- This tracker can also be attached to any 12-30 voltage supply in the vehicle.

Navigation LED Indications
Normally after Connecting to the battery both leds are flashing together to show it has cellular & satelite signal.
| Behaviour | Meaning |
|---|---|
| Permanently Switched On | Satelite signal is not received |
| Blinking Every Second | Normal mode, Satelite signal is working |
| Off | Satelite signal is turned off because: Device is not working or Device is in sleep mode |
| Blinking Fast Constantly | Device firmware is being flashed |
Status LED Indications
| Behaviour | Meaning |
|---|---|
| Blinking Every Second | Normal mode |
| Blinking Every Two Seconds | Sleep mode |
| Blinking Fast For A Short Time | Cellular Signal activity |
| Off | Device is not working or Device is in boot mode |
